增加自定义程序到系统内
增加自定义程序到系统内
确定系统的init服务
通过 make menuconfig方式 来确认 自己系统默认的init服务是哪一个。
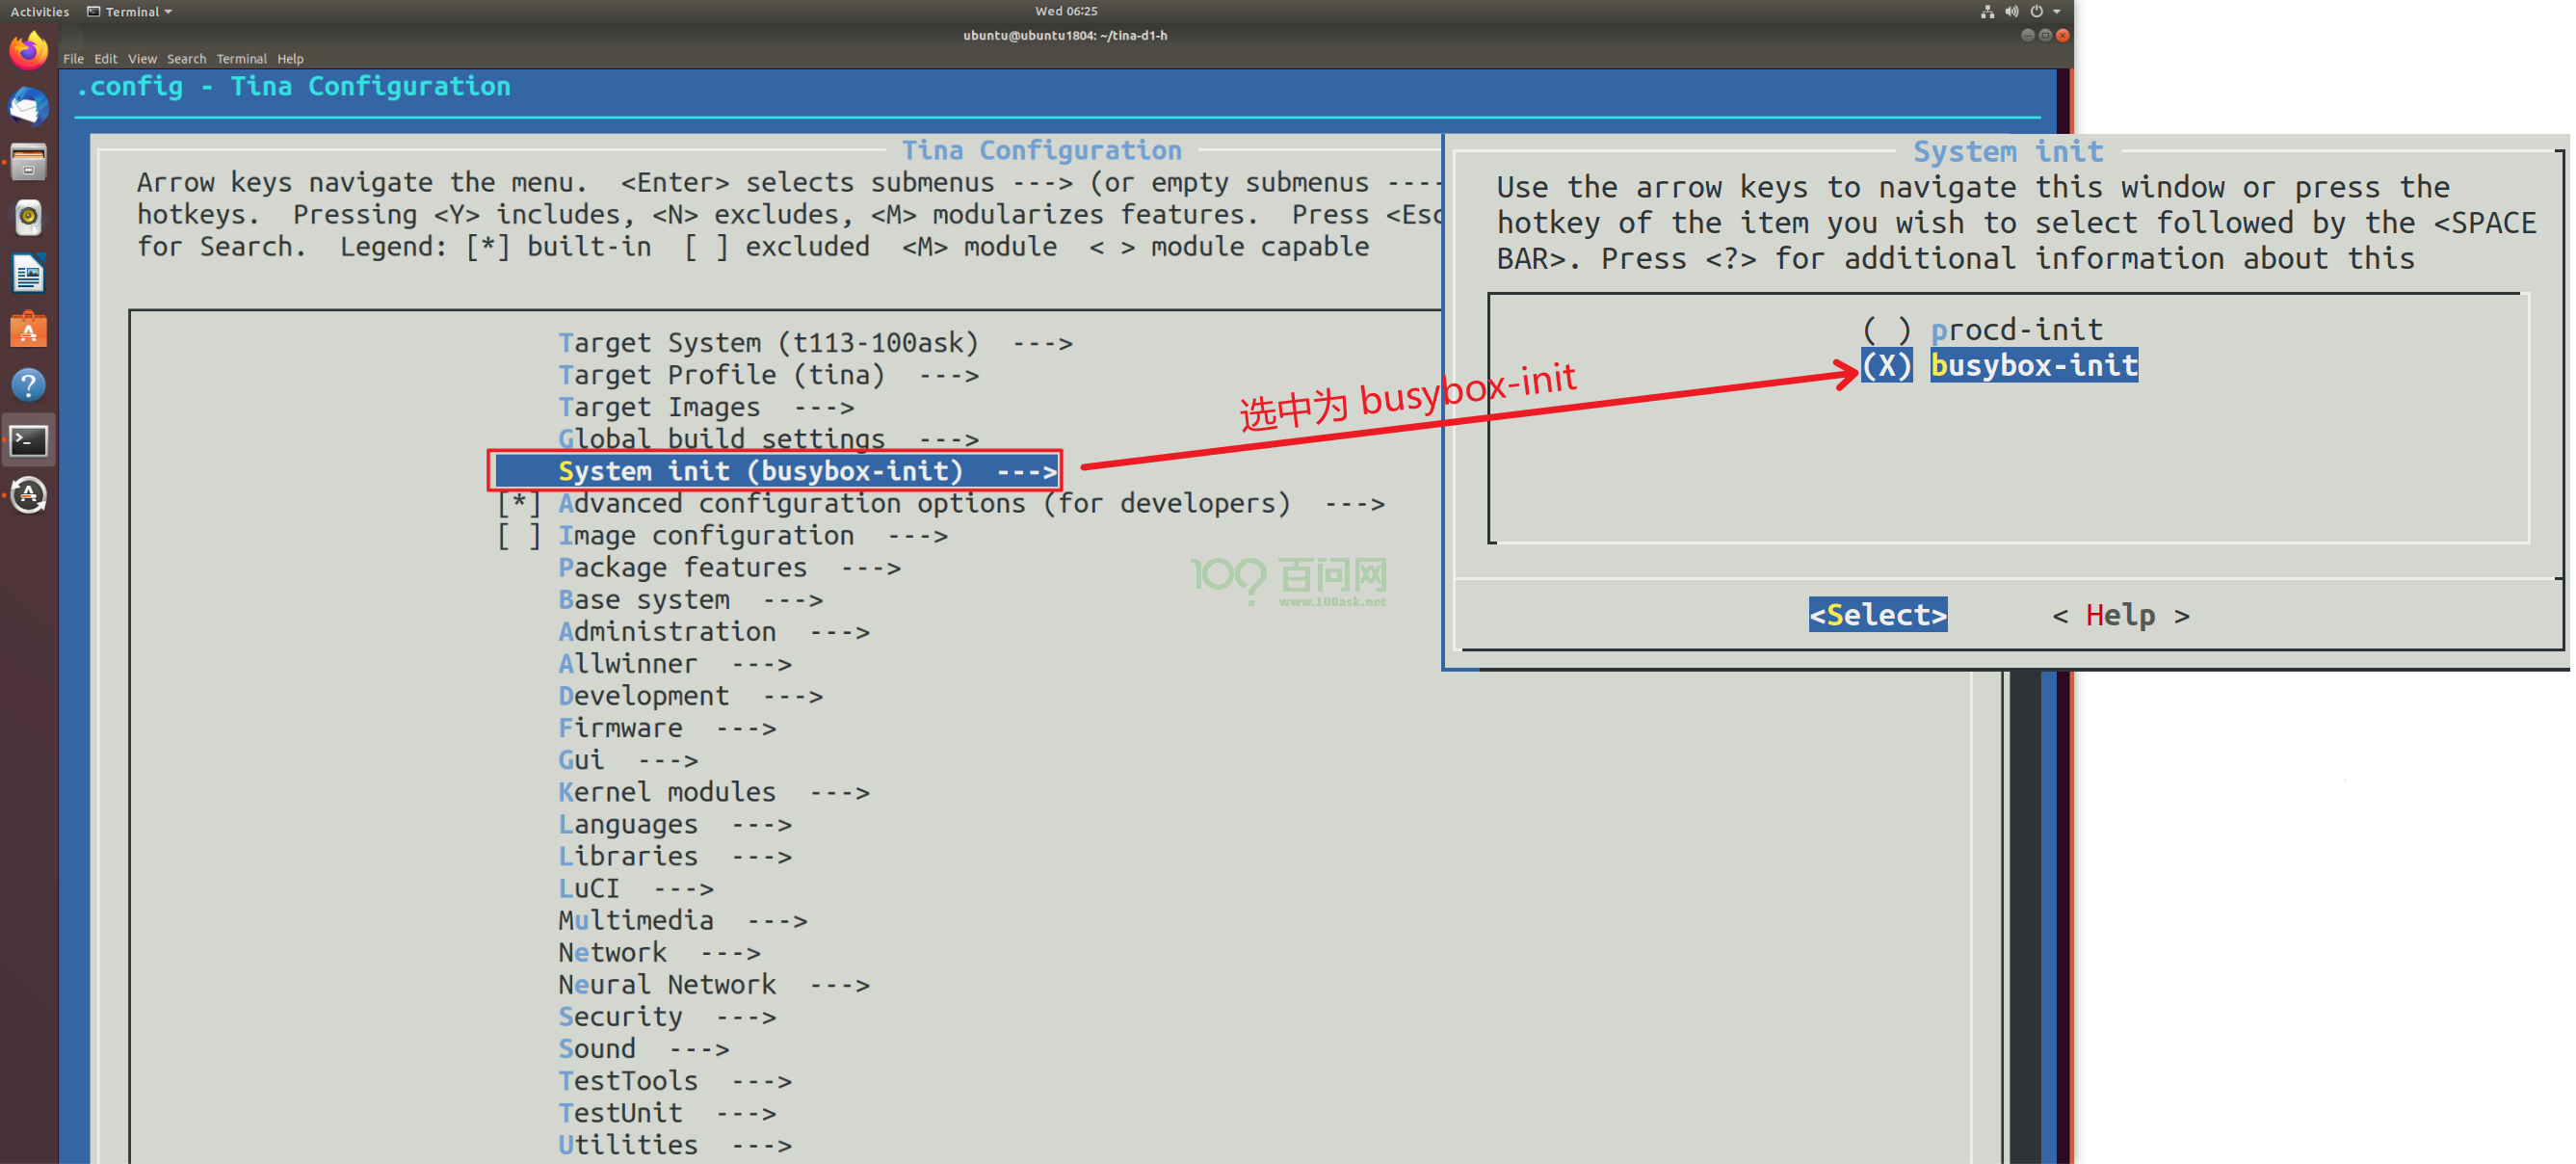
通过查看TinaSDk系统默认的 defconfig 找到INIT选项,(配置文件在 target/allwinner/t113-100ask 目录可以使用 cdevice 快捷命令)。
通过查看那个使能来确定是busybox-init 还是 proc init 由此我们可以知道自己的程序 需要添加到那个TinaSDK rootfs覆盖目录内,才能打包成功。
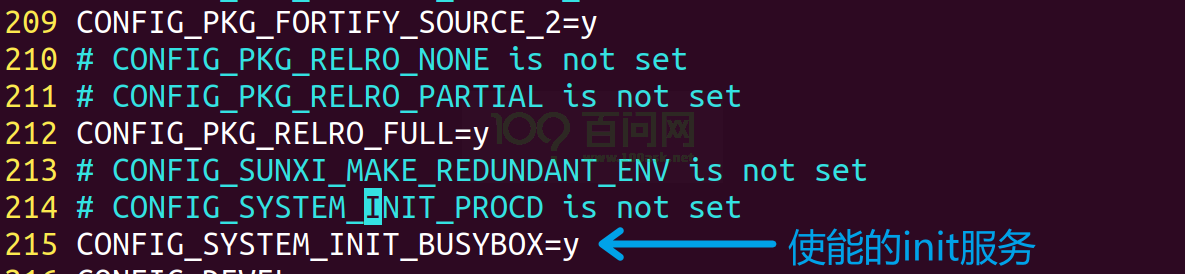
通过查看配置文件/选项可以知道 我们使用的是busybox- init 其中rootfs覆盖文件夹在 target/allwinner/t113-100ask/busybox-init-base-files 目录内。

ubuntu@ubuntu1804:~/tina-d1-h/target/allwinner/t113-100ask/busybox-init-base-files$ tree
.
├── bin
│   └── setusbconfig
└── etc
    ├── asound.conf
    ├── device.prop
    ├── init.d
    │   ├── adbd
    │   ├── load_script.conf
    │   ├── rc.final
    │   ├── rcK
    │   ├── rc.modules
    │   ├── rc.preboot
    │   ├── S00mpp
    │   ├── S01logging
    │   ├── S10udev
    │   ├── S11dev
    │   ├── S20urandom
    │   ├── S40network
    │   ├── S41netparam
    │   └── S50telnet
    ├── inittab
    ├── profile
    ├── swupdate_public.pem
    ├── udhcpd.conf
    └── wpa_supplicant.conf

3 directories, 22 files
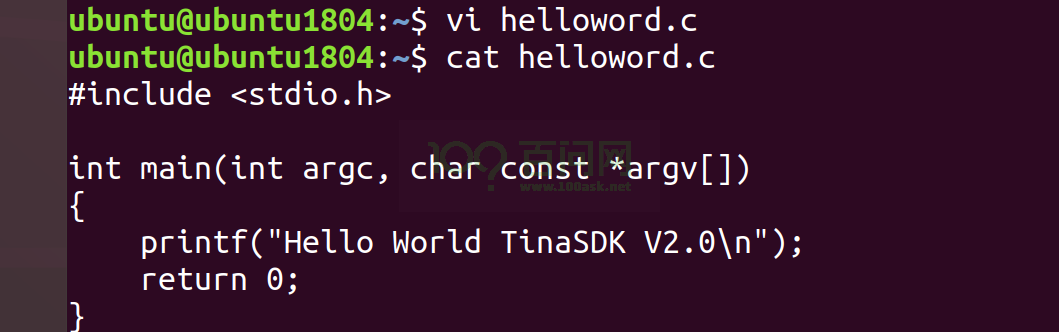
添加一个自定义hellowrod
#include <stdio.h>

int main(int argc, char const *argv[])
{
    printf("Hello World TinaSDK V2.0\n");
    return 0;
}
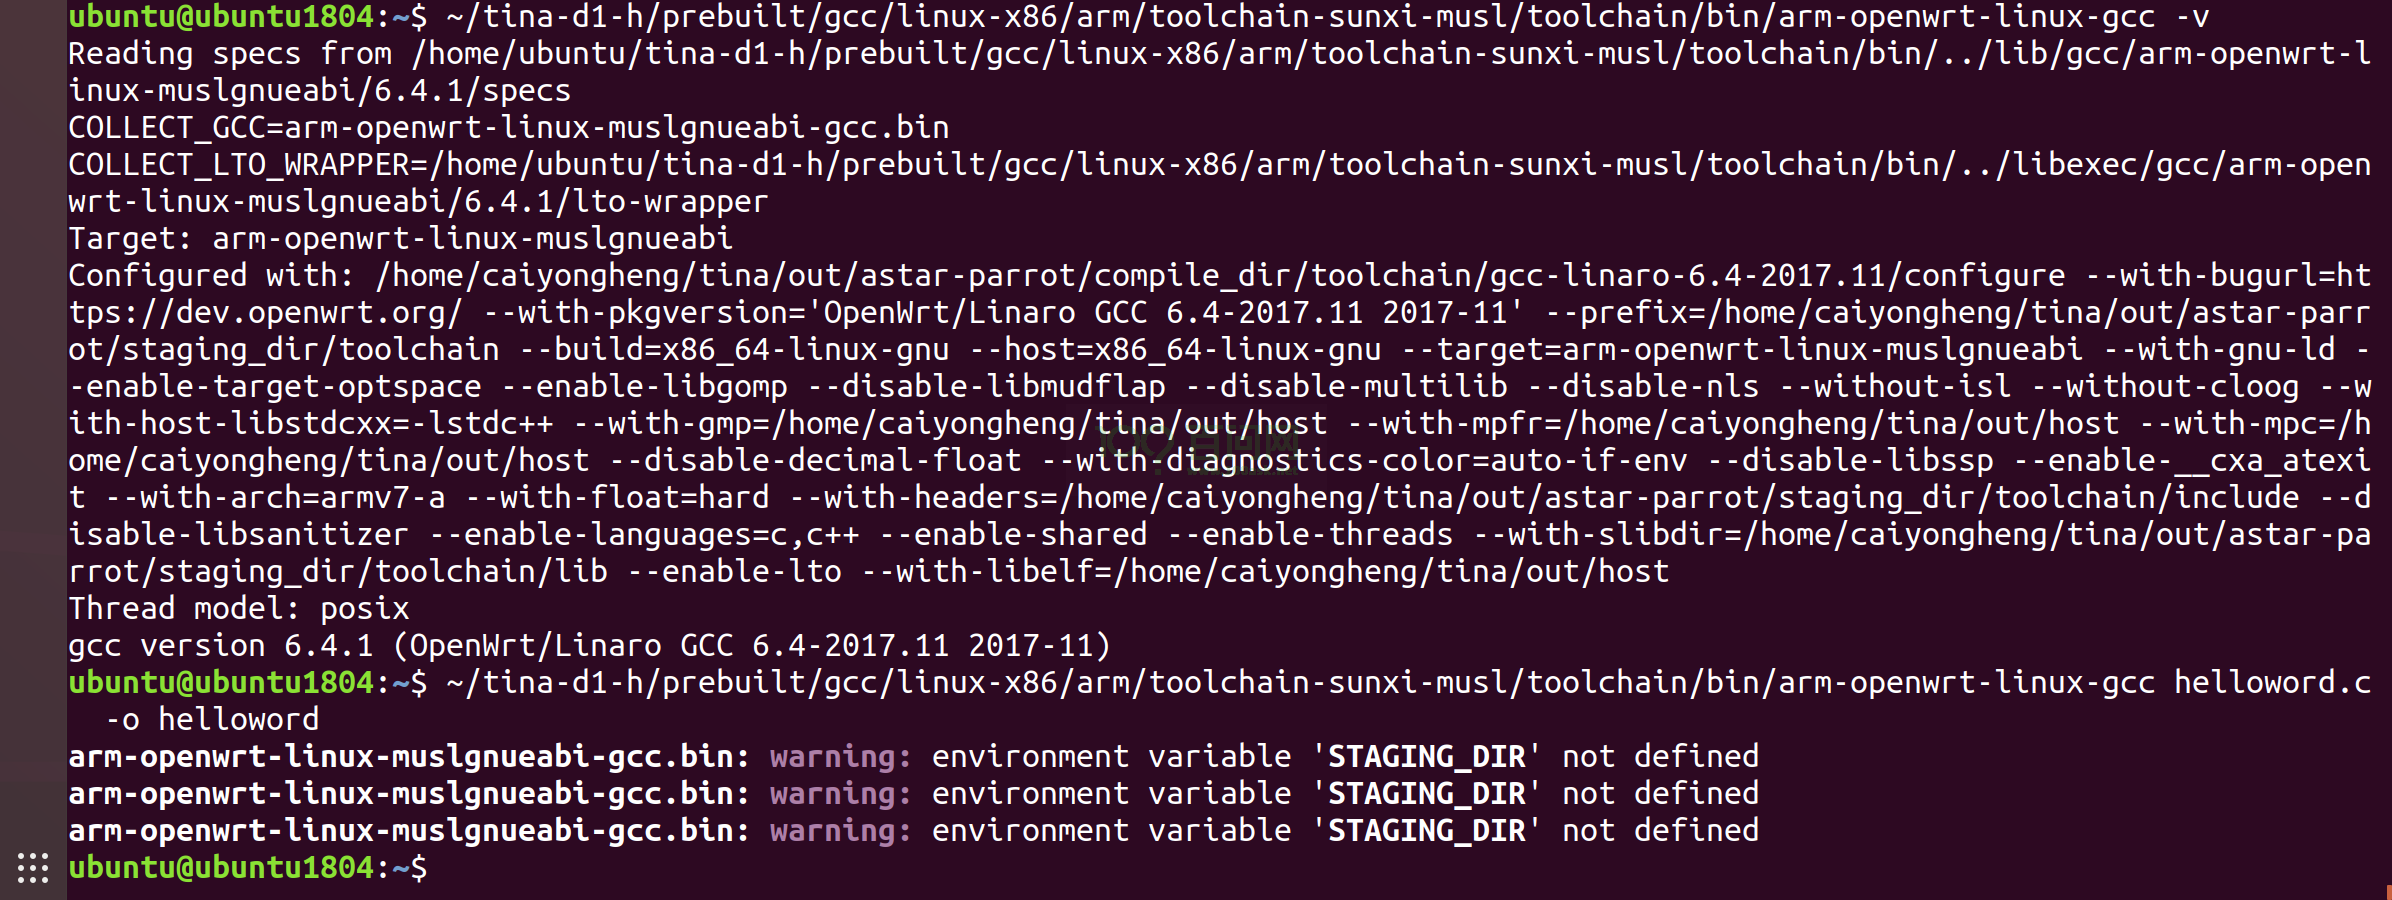
使用TinaSDK GCC编译
~/tina-d1-h/prebuilt/gcc/linux-x86/arm/toolchain-sunxi-musl/toolchain/bin/arm-openwrt-linux-gcc helloword.c -o helloword
将目标可执行程序 复制到 busybox-init rootfs覆盖目录内,因为是一个 可执行程序,所以直接复制到 bin目录
cp helloword tina-d1-h/target/allwinner/t113-100ask/busybox-init-base-files/bin/

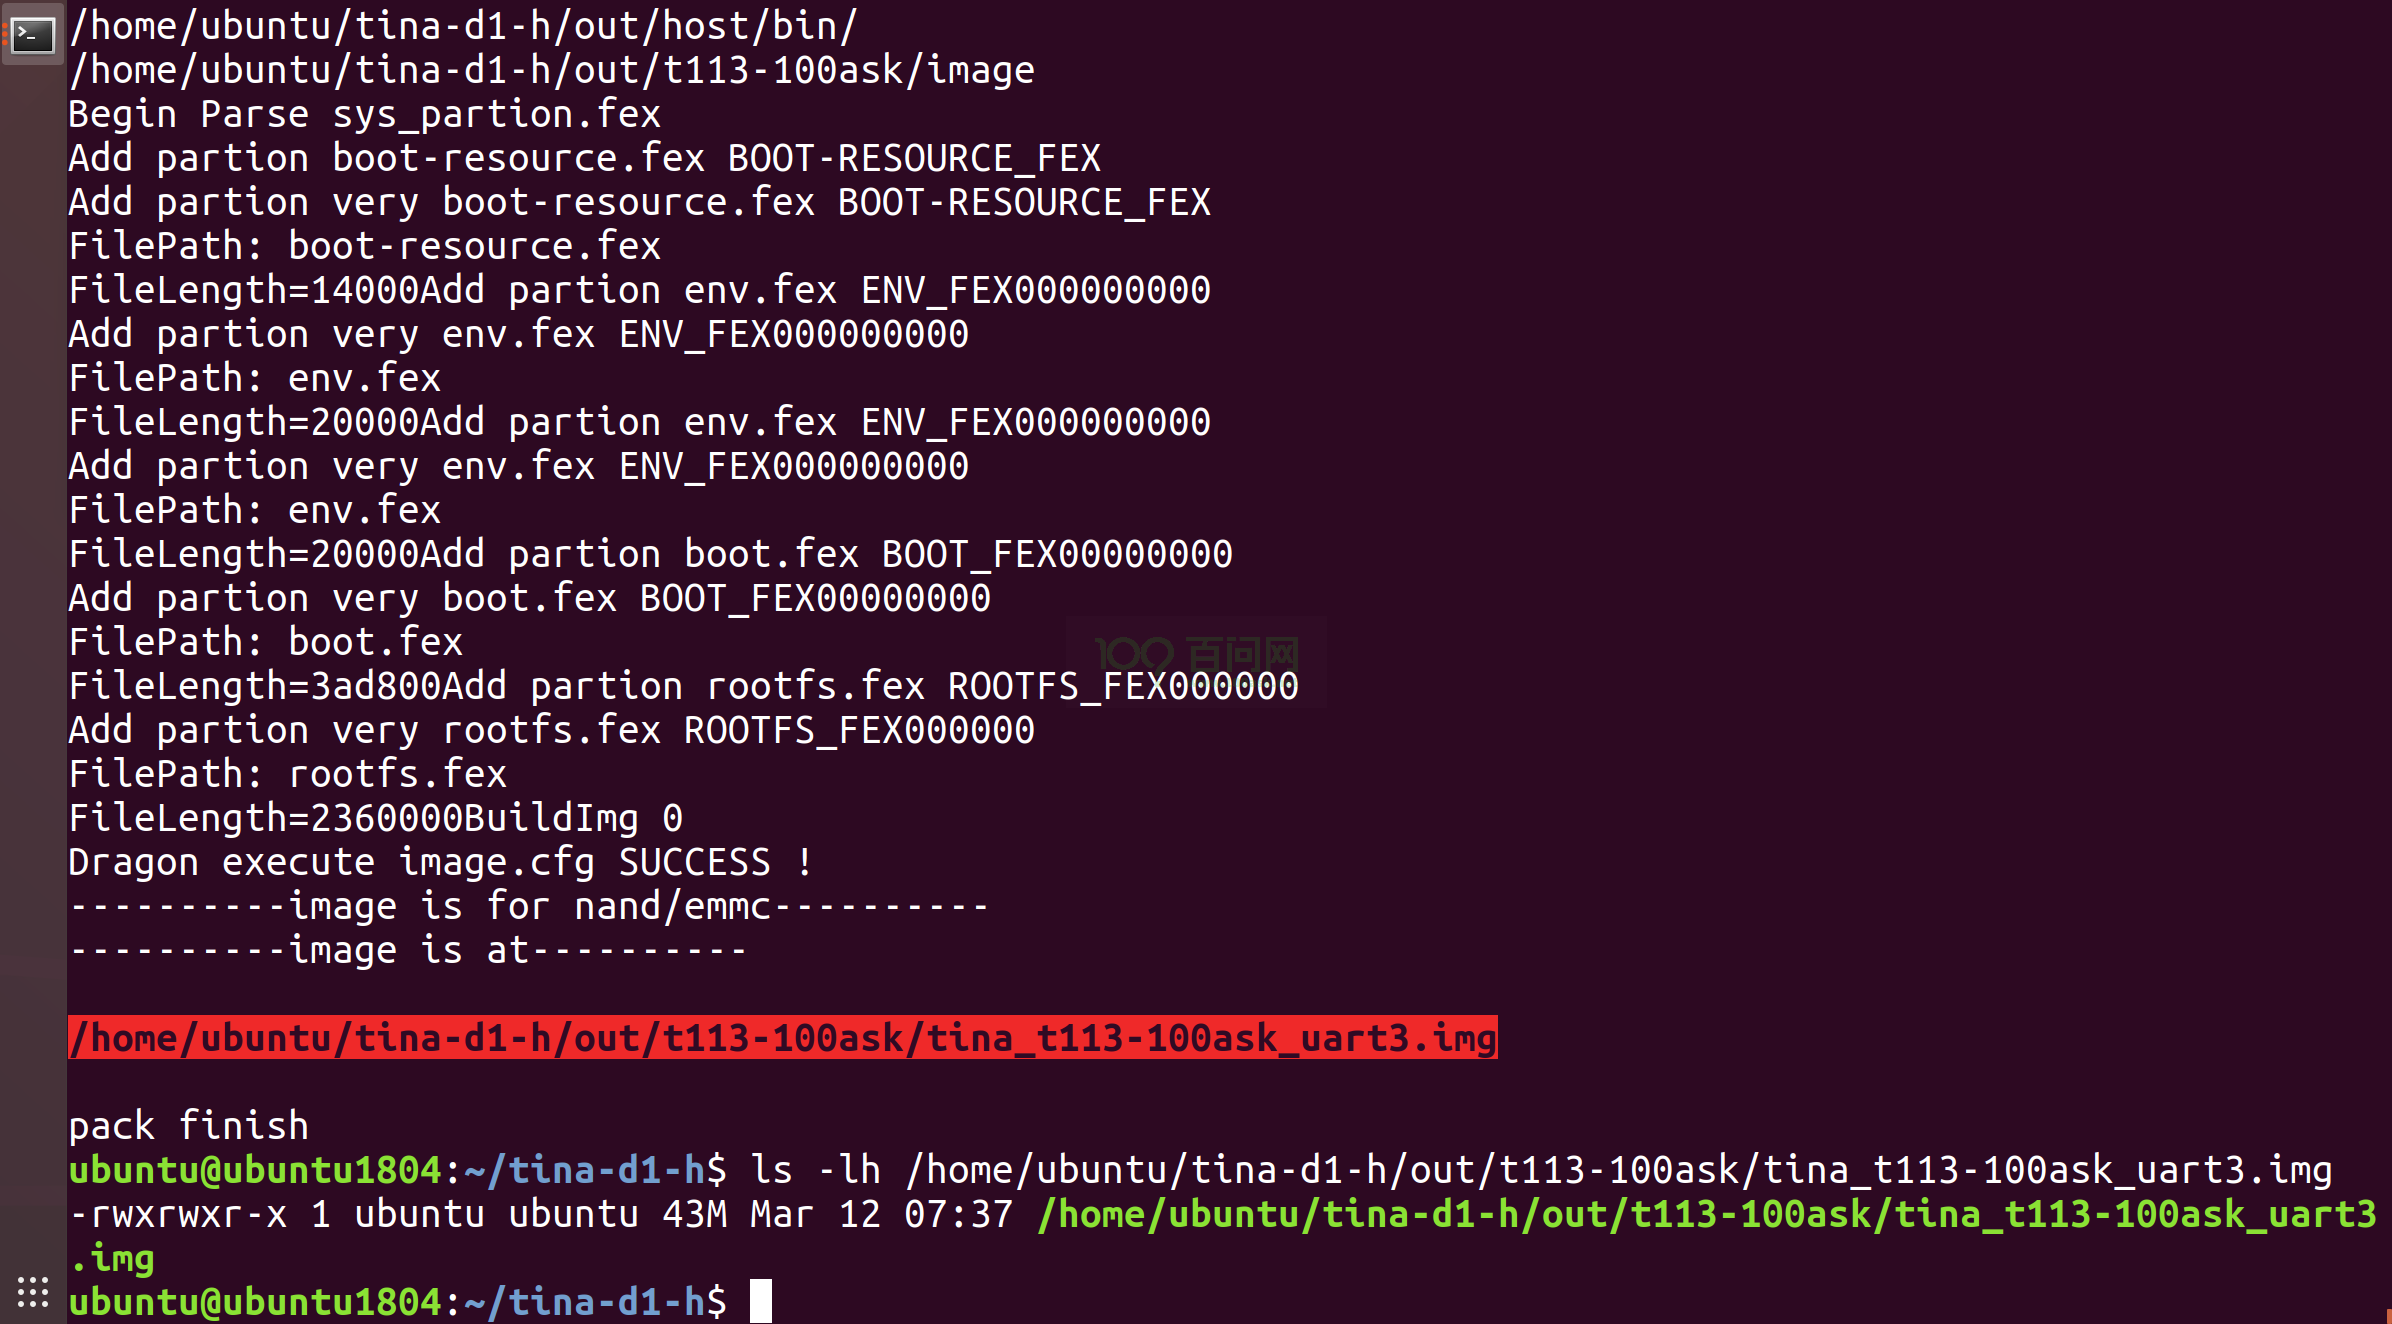
操作完成后,回到TinaSDK 根目录下,继续执行 make 命令来编译完整系统。
编译打包烧录
编译完成后,执行 pack 命令即可开始打包系统操作,打包完成后,最后会 提示 pack finish 以及使用 红色背景色 告诉你 最终输出的镜像文件。
我们通过 ssh / vmware 拖拽等工具,将其 copy 出来即可。
烧写方式 有两种,一种是线刷,使用 PhoenixSuit 将编译生成的镜像烧录至 spi nand 存储设备上,另一种是通过 PhoenixCard-V2.8 工具将系统镜像烧录至TF卡启动。 我们推荐使用 线刷 烧录至 spi nand 方便快速实验。
参考文档:https://allwinner-docs.100ask.net/Board/100ASK_T113-PRO/03-1_FlashSystem.html
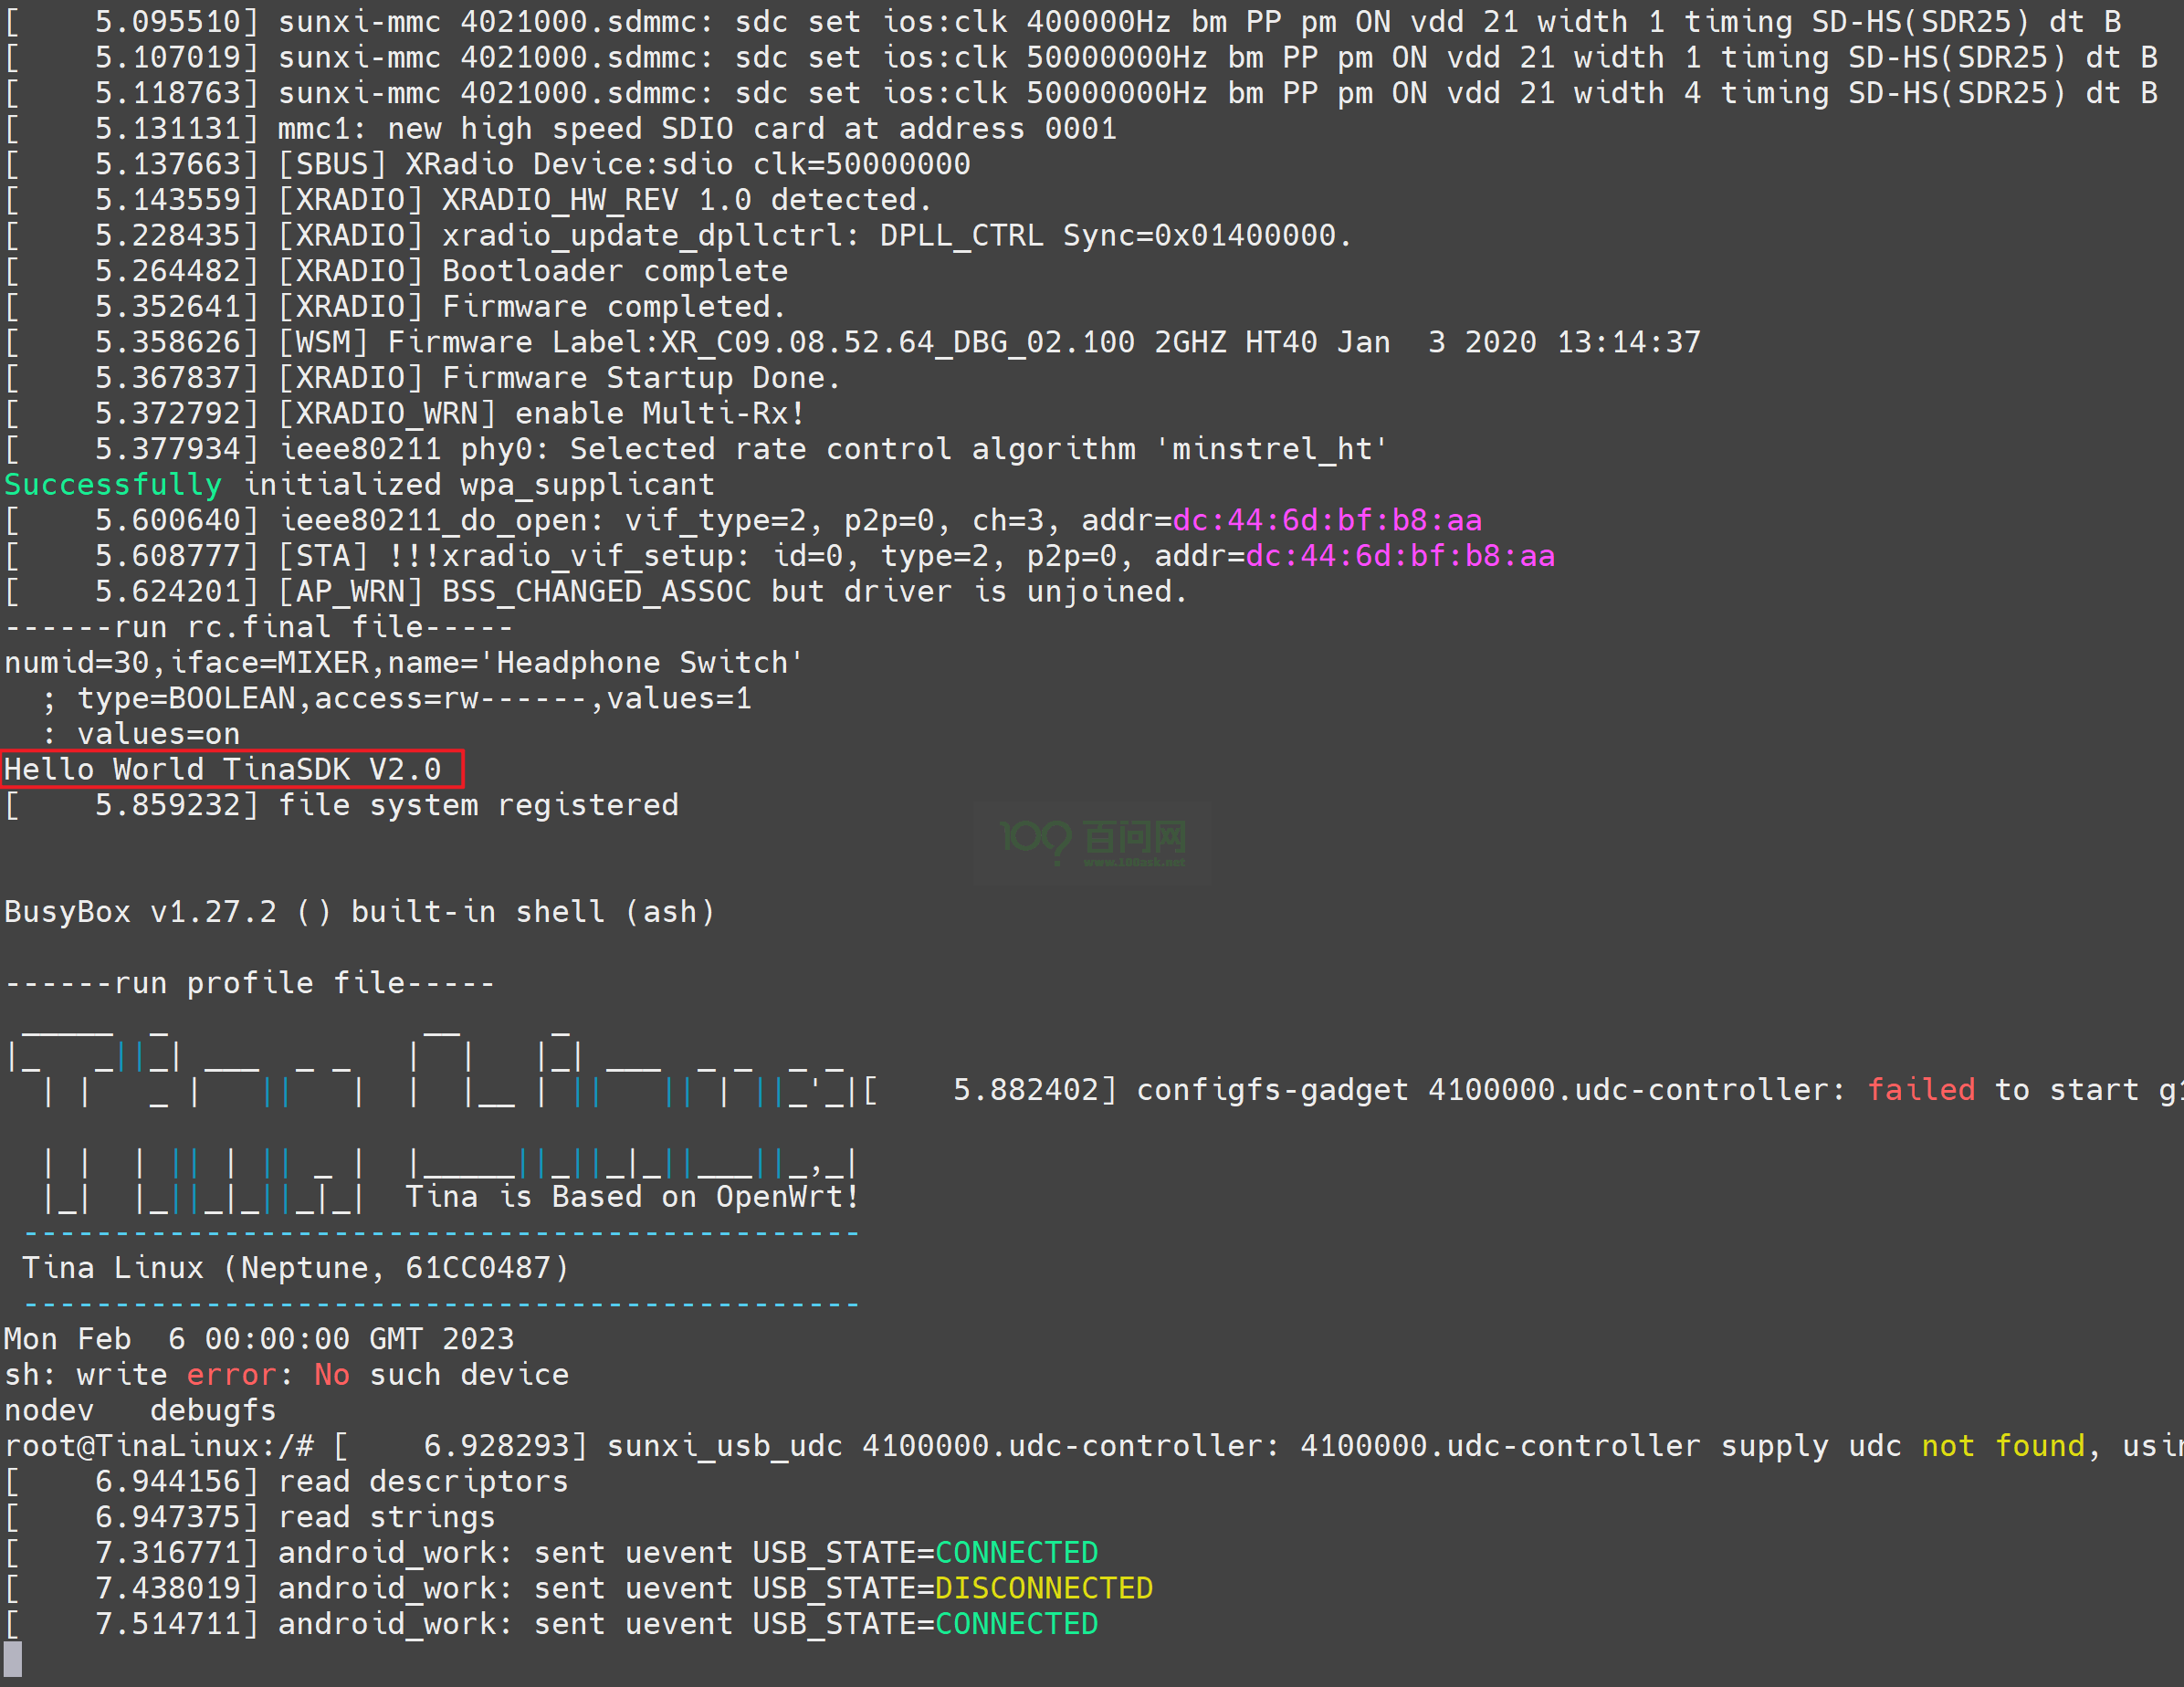
启动验证
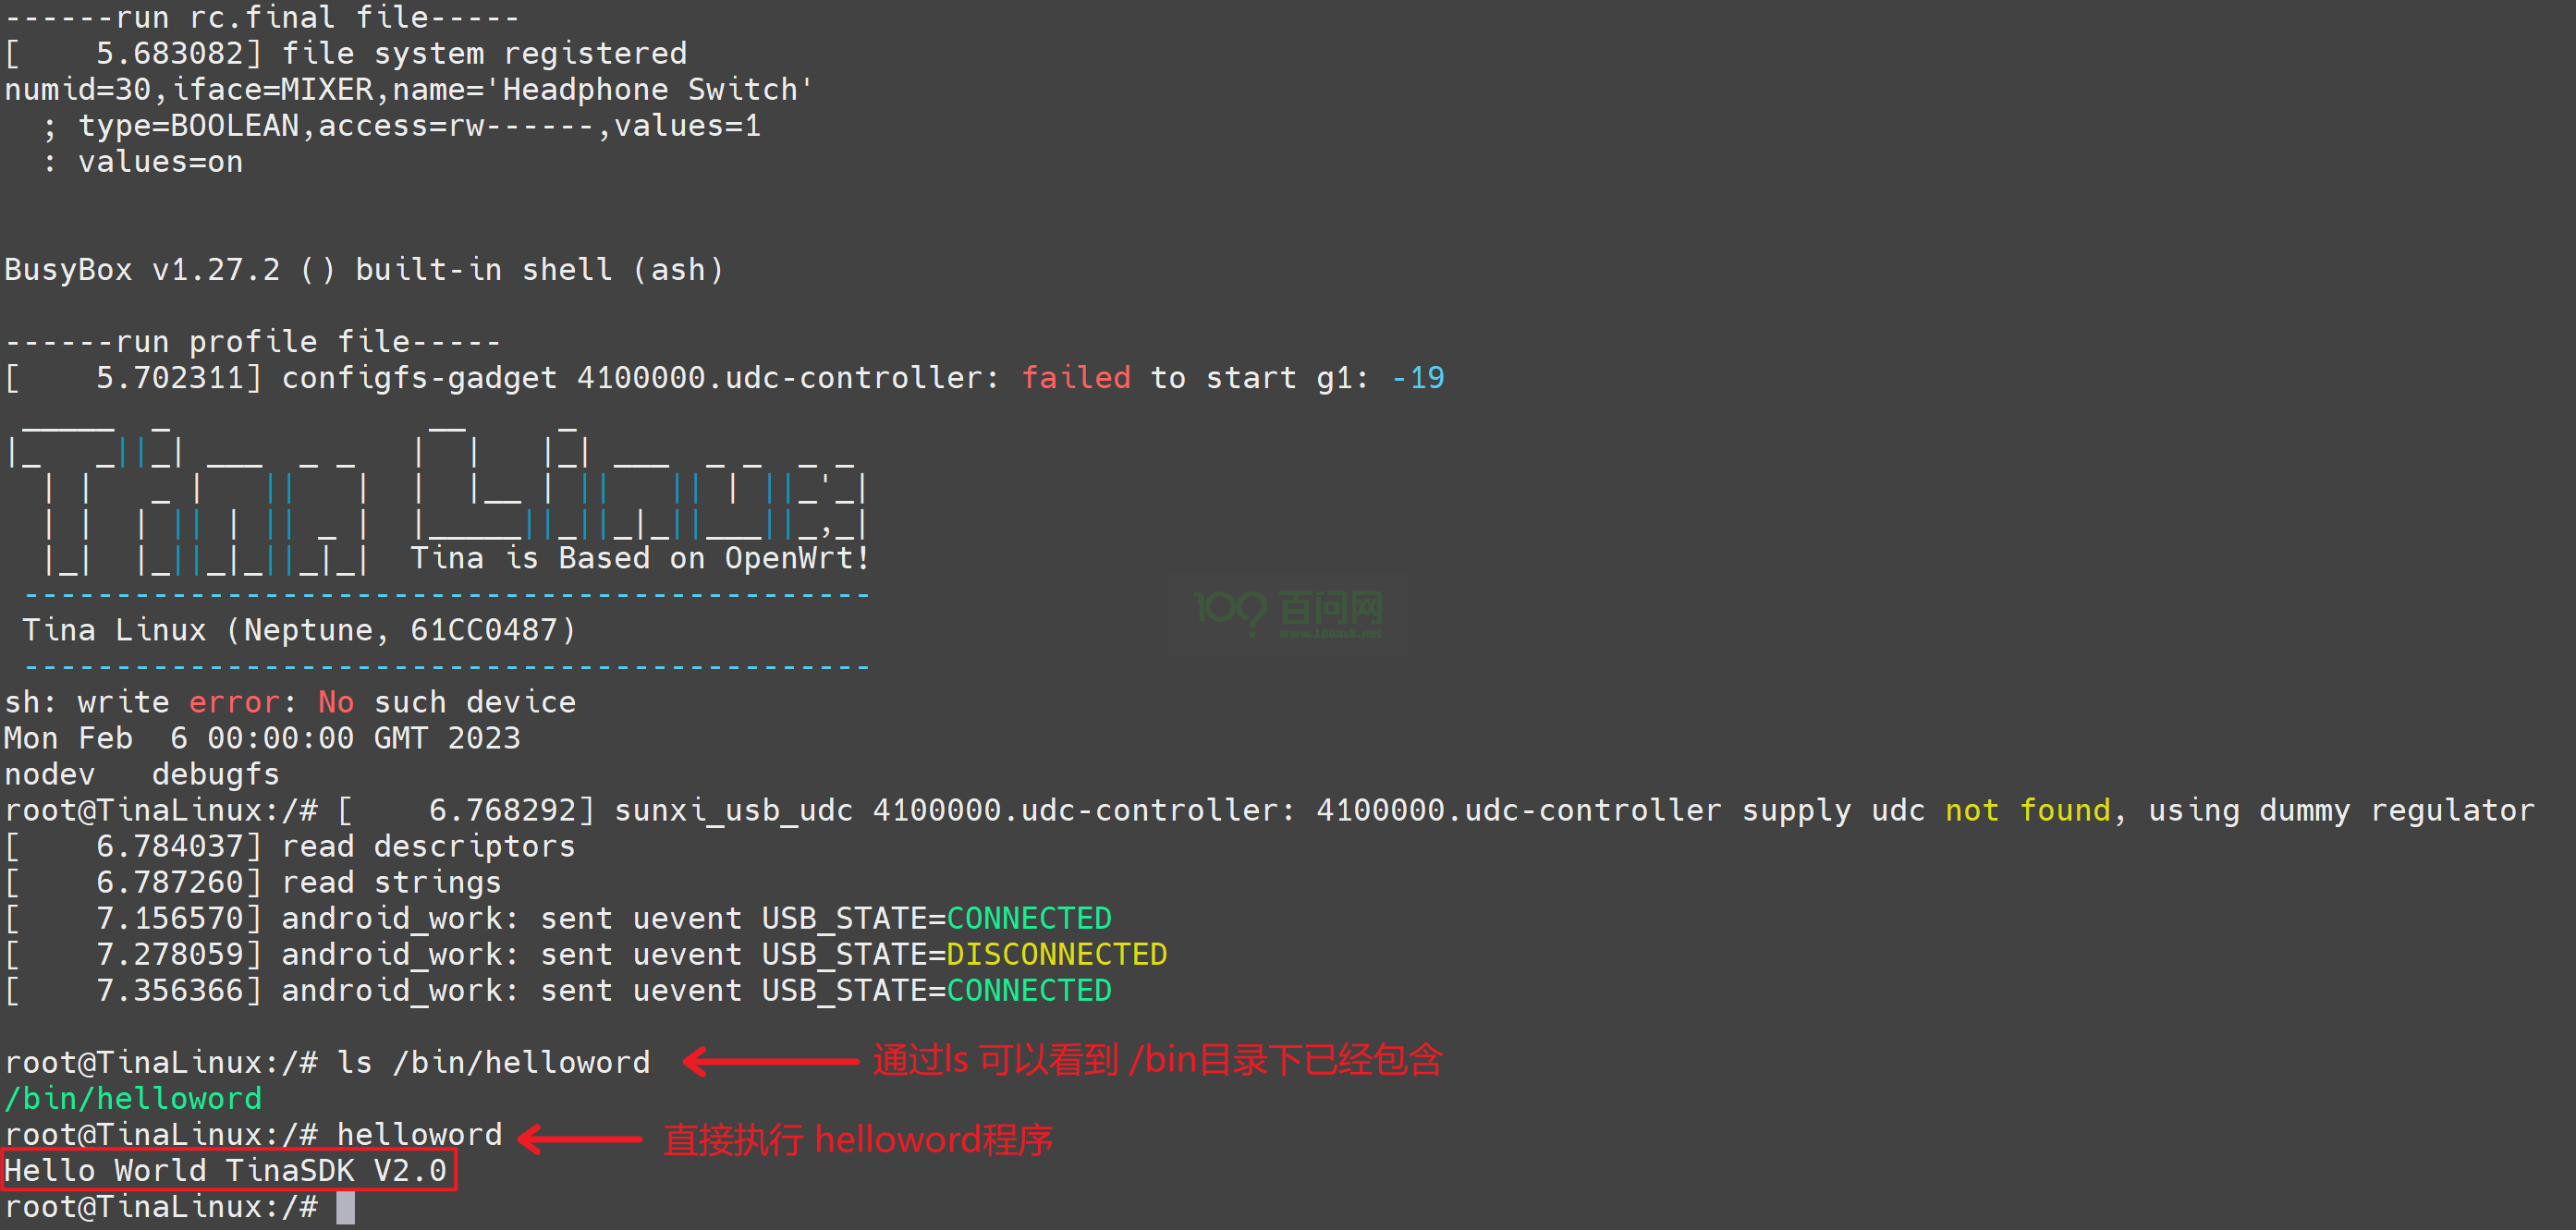
开机自动执行
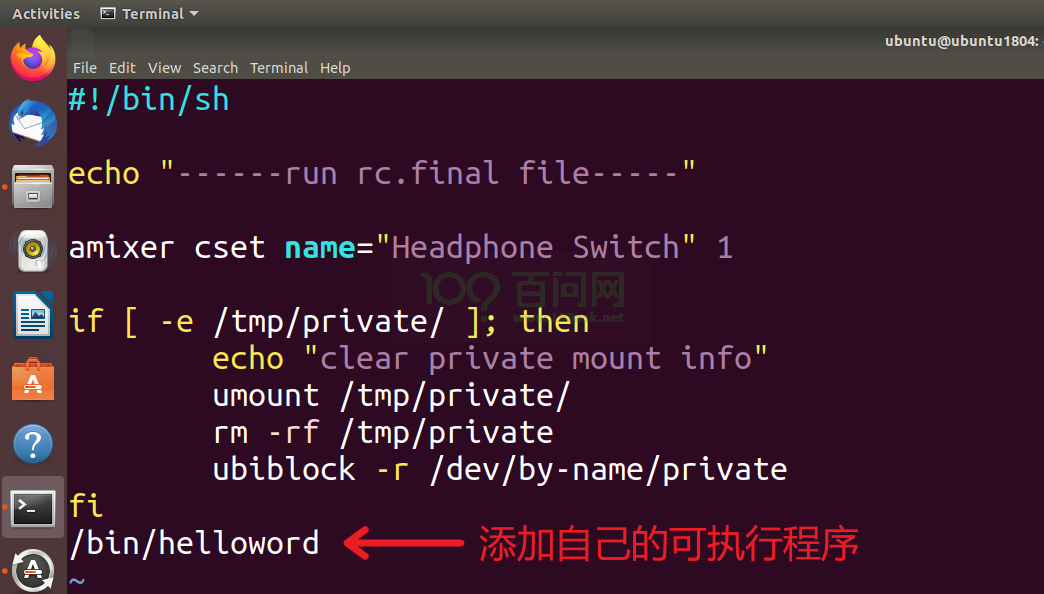
在系统 rc.final 增加自定义命令 target/allwinner/t113-100ask/busybox-init-base-files/etc/init.d 编辑 rc.final 文件
编译打包烧录
执行make 编译完成后,就可以执行 pack 命令即可开始打包系统操作,打包完成后,最后会 提示 pack finish 以及使用 红色背景色 告诉你 最终输出的镜像文件。 我们通过 ssh / vmware 拖拽等工具,将其 copy 出来即可。

烧写方式 有两种,一种是线刷,使用 PhoenixSuit 将编译生成的镜像烧录至 spi nand 存储设备上,另一种是通过 PhoenixCard-V2.8 工具将系统镜像烧录至TF卡启动。 我们推荐使用 线刷 烧录至 spi nand 方便快速实验。
参考文档:https://allwinner-docs.100ask.net/Board/100ASK_T113-PRO/03-1_FlashSystem.html
启动验证